Also referred to as TOSLINK or SPDIF ports, optical audio ports have become a standard procedure in all current sound systems to make transmitting high-quality digital audio from one device to another easy. Since digital audio signals have a much lower noise susceptibility than audio signals that are said to be analog, audio systems using optical links are guaranteed of sound quality enhancement. This paper examines the relationship between TOSLINK or SPDIF ports and high-fidelity sound systems. In other words, this paper will investigate the pros and cons of those ports that make it possible to connect one sound device to another device or several other devices. To start with, one would need to explain the role played by optical audio connections.
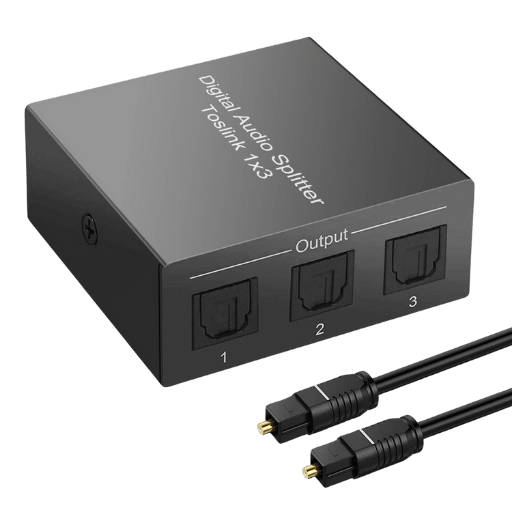
An optical audio port is used for the transmission of digital audio data encoded into light signals, which passes through a fiber optic wire. This is dispelled in contrast to the electrical signals passing through copper wires, which are prone to high electrical interference, and therefore, the sound produced isn’t of good quality. Optical audio ports use the TOSLINK standard connector. The TOSLINK is small and square and is found on most audio equipment. The optical audio ports use an LED or laser diode, generating light that encodes audio data into pulses. During the receiving phase, the light signals are transformed back into electrical signals that can be treated as audio. Optical ports normally support two-channel PCM stereo and compressed surround sound formats which include Dolby Digital and DTS, thus they have a wide range of applications.
Through diverse light emissions coding the audio signal, the optical cable transmits audio signals that are in digital format. This process starts with the optical ports that have an LED or a laser diode that converts electrical sounds to light. The light impulses travel through the core of the fiber optic which helps to keep the light signal intact by reflecting it as it moves along the length of the cable. Now, at the end of the device, these light pulses are intercepted and turned back to electric sound signals, which can be used for output processing. The transmission of signals through light offers a minimal duration of the signal to be lost and high tolerance to electromagnetism, making the audio output of high quality.
Concerning signal quality, using TOSLINK connectors for stereo optical audio comes in handy because no electromagnetic interference can affect the user experience. Comparatively, optical audio connections would be better than analog connectors which transmit audio information and are susceptible to anisotropic interference. On the other hand, HDMI connections contain more bandwidth and more recent audio and video formats. In contrast, optical interlinks are still used, especially in simple AV audio settings, because of their strength and most unit compatibility. Nevertheless, they do not support high-definition lossless formats such as Dolby TrueHD secured by HDMI connections.
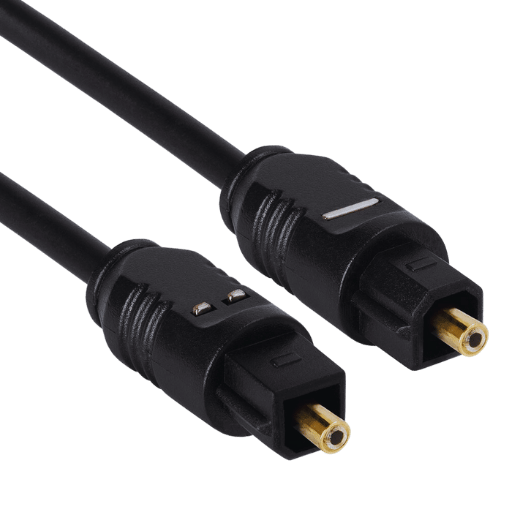
If optical connections seem to be giving trouble, there are several ways how to troubleshoot and fix the problems most efficiently:
If the issue persists, it would help to switch the optical cable to a new one or consult the device’s user manual for more specific troubleshooting instructions according to the equipment’s model.
It is crucial to check audio device settings and physical connection elements for errors to achieve maximum sound and picture quality from an optical audio cable. At first, it’s necessary to check whether the cable is damaged or bent since both may diminish signal quality. So, use the right good quality optical cables designed to perform well. Ensure the audio settings in all the devices match the capability and limitations of your receiver. If you want to greatly improve the optical audio cable connection on multiple setups, inspect and clean every cable port on both ends of the optical cable audio connection since dust may shorten its lifespan. When evaluating audio problems that interfere with or degrade sound quality on the connection, be sure to do the following: consider using different optical cables since the old ones may have problems, check if the firmware or drivers on your devices are up to date, and go through the troubleshooting sections of the user guides for the procedures that are fit to information from the manufacturers.
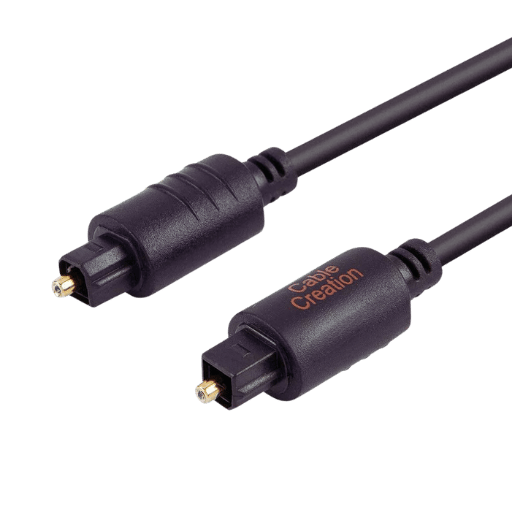
In the debate of whether optical audio or HDMI is superior to the other, the technical features offered by both connections must also be considered. Being a digital interface, HDMI passes through uncompressed audio formats, such as DTS-HD Master Audio and Dolby TrueHD, which, upon comparison to the sounds supported by optical audio, are usually superior. HDMI also has high bandwidth, which makes it possible to incorporate new audio formats and sound experiences such as Dolby Atmos. On the other hand, optical audio is good at carrying standard surround sound formats such as Dol Dolby Digital or DTS sound signals. Still, it does not have enough bandwidth to carry the more advanced audio signals. Therefore, optical audio can be considered technically inferior in terms of sound in general. Still, when advanced features come into play, HDMI is the better option as it is more complex than optical audio. But when connecting a TV to a soundbar with limited HDMI ports and simpler setups, HDMI is more than the ideal option. But when connecting TVs with sound bars with limited ports, optical audio will work just fine.
Dolby Digital offers supplementary multi-channel audio encoding with a high compression ratio. This format enables the optical interface to carry as much as 5.1 discrete channels, making it more compatible and applicable to most home theatre systems. This format is widely used with optical audio thanks to its excellent surround sound capabilities. However, because of the bandwidth constraints that come with optical interfaces, advanced audio formats like DTS-HD Master Audio cannot be fully utilized. Also, DTS-HD Master Audio, being a lossless audio carried over HDMI, has demanding capabilities that go beyond that of the optical interface. Hence, its usage is less in situations where optical connections are available. This is why HDMI audio output remains the standard in lossless high definition, while optical audio is suitable to its limits and performs quite well with the Dolby Digital surround format.
An HDMI audio extractor allows connecting HDMI devices that have an optical audio output. The optical audio extractor takes HDMI as a source, and outputs an audio signal through an optical cable. As a result, it is now possible to connect a Blu-ray player or a game console using HDMI to a sound system without HDMI but equipped with an optical audio input. However, surround sound formats like Dolby Digital can be transmitted using the extractor’s optical output; however, this would have to sacrifice advanced formats requiring a higher bit rate. Therefore, an HDMI audio extractor, while useful for connecting a wider range of devices, cannot circumvent the restrictions of optical audio in terms of advanced audio formats and lossless audio options.
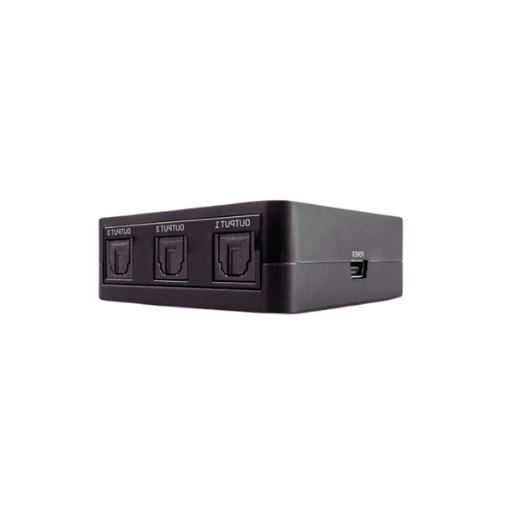
If you are selecting audio equipment for an optical setup, purchasing components specially made to function optimally with optical interfaces is crucial. This is to ensure the setting up process works smoothly. Look for optical audio inputs on soundbars, AV receivers, or BBQ grill systems. Choose devices that can accept Dolby Digital since this is the default supported audio format available through optical cables. Further, the equipment must be sufficient in power and channels to suit the intended purpose, which may be a basic two-channel system or a multi-speaker arrangement that covers more expansive spaces. It is also important to consider the future growth of the sound system and properly configure the components to allow for such growth while ensuring that the optical digital audio is supported. For instance, consider the length and reliability of the optical cables used; use cables that can reduce signal degradation along the necessary distance. Such a selection guarantees that the intended audio quality is achieved within the boundaries of practical deployment of optical connections, especially when using the latest high-resolution audio formats.
To effectively combine a sound bar with a surround sound system, first check what ports are available on your sound bar and currently available on your audio system. Sound bars are generally equipped with HDMI ARC (Audio Return Channel) output, which could be connected to the AV receiver’s or TV’s HDMI ARC output for audio transmission. If there is no HDMI ARC port, the second option will be to use optical audio connections. Optical cables connect the optic output of your surround sound system to the input of the sound bar while ensuring that both appliances are set to accept that mode of audio transfer. Furthermore, high-end sound bars can connect wirelessly through Bluetooth or WI-Fi, which gives more ease of integration without you running many wires. This configuration improves the clarity of the sound in combination with the sound bar and surround system.
Ensure the optical audio ports and cables used for the surround sound system are properly connected. Also, ensure there are no bends or kinks at the ports since these would lower signal quality. Use quality optical audio cables. These have been proven to minimize degradation. Furthermore, the sound equipment settings should be adjusted to select the proper input. This may involve changing the AV receiver or sound bar input sources menus to select Digital Plus. Make sure that the source and receiving devices support relevant digital signals.
An example is Dolby digital or DTS. Tis allows for maximum audio fidelity. Optical ports collect a lot of dust and debris. Cleaning them would eliminate interference, leading to uncompromised audio performance.
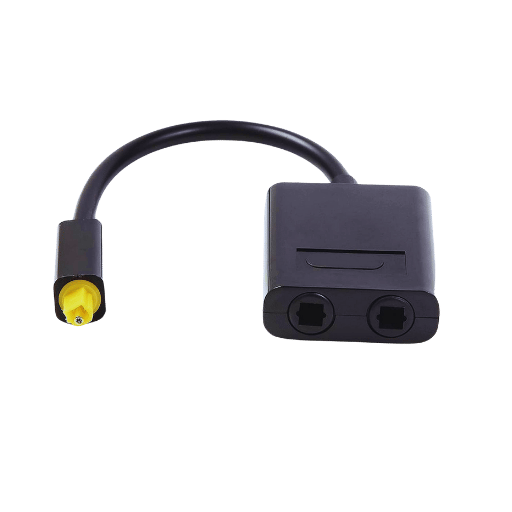
Toslink to RCA Audio Adapter systems work by accepting Toslink cables, which are used to stream digital audio signals through an optical interface and, in turn, produce an audio signal through analog inputs of various components. Audio components designed to use this interface have their information passed through a DAC chipset or digital-to-analog converter chips, which are decoded using an electronic waveform describing the information in the component. The end result of this type of technology is translated into a two-channel audio signal, which happens after the digitally coded information is passed through an optical arm interface concerned with electronics. It offers an efficient means of interfacing with older audio systems counterparts and more modern audio devices working on digital signals.
Now that you have established which Apple TV models can use an audio adapter. Suppose it does not feature an optical port. In that case, to opt out of utilizing an optical audio port, an HDMI audio extractor that separates the audio signal from the HDMI output needs to be installed in a single Toslink connection. Once you’ve got the right extractor, you’re ready to go. To begin, connect the HDMI cable from the HDMI port of your Apple TV to the extractor’s HDMI input port. Using a Toslink cable, connect the extractor’s optical output to the optical output of your audio systems. For a clearer sound, make sure that your audio system and Apple TV have been turned on and correctly switched to the input that you’ve chosen.
It is worth mentioning that Toslink connections also have several downsides, including a diminished sound quality that may be affected by electromagnetic interference. Due to their optical nature, Toslink cables eliminate or significantly reduce electromagnetic interference while providing a more detailed sound than their copper counterparts. Toslink connectors are widely adopted in high-fidelity audio systems. Another notable feature of Toslink cables is their compatibility with multiple audio formats ranging from uncompressed formats like PCM to various Digital encoded HD formats such as Dolby Digital and DTS. Due to their optical nature they do not degrade in signal clarity, allowing them to maintain sound quality at longer distances compared to analog cables. Overall, if you’re looking for quality audio performance, Toslink would be ideal.
A: An optical output is a type of port for transmitting audio and sound from one device to another device. It does that by utilizing a TOSLINK port. This is similar to a 3.5mm jack, except that instead of sending an audio wave through a cable, it sends light pulses representing audio signals. This way, the TOSLINK cable ensures clear sound without distortion and interference.
A: First, to connect an optical signal, you would have to plug the optical cable into the receiving and the input devices. The input device can be anything, from a soundbar, set-top box, or a TV. The most common labeling of the slot for the optical cable is TOSLINK or Optical, and they mostly have a red illumination around the slit. Grab a TOSLINK cable, and slot one end in one device and the other end in the other device. You’ll hear a click that tells you the cable is inserted properly.
A: Compared to standard audio, TOSLINK optical connections have numerous benefits. They provide a clean single, which has less chance of interference and improved quality and is crucial in output sounds, especially in high-fidelity systems. TOSLINK wires can also pass through multi-channel audio like Dolby digital surround sound formats. In addition, they are also not affected by electromagnetic interference, which makes them perfect for systems that have cables near power cables or any other devices.
A: Absolutely, when a single distinctive TOSLINK port is not available on older devices, an audio converter adapter and an optical input can be used to link newer generation devices. In this case, these adapters usually transform the optical digital signal to RCA or 3.5mm analog outputs to be used with older speaker systems. But remember, this conversion may lead to audibility of lower volume than would be audible with a digital link output.
A: An optical connection supports a variety of digital audio formats, including PCM stereo, Dolby Digital, and DTS. However, while Optical can carry compressed 5.1 surround sound, it does not support newer high-bandwidth audio formats such as Dolby TrueHD and DTS-HD Master Audio, as they are greater than what Optical can carry.
A: If you are facing an optical connection sound problem, you first need to check whether the cable’s two ends are plugged correctly. For example, check whether a red light is visible at the other end when you plug in the cable. Then, check the settings in the source device to see whether the output is selected as optical output. Some devices may need to be set up so that the optical audio output may be selected. If the problem persists, it is worth checking another optical cable to see if it is faulty, as optical cables can sometimes fail, particularly when an update of newer high-definition sound formats eclipses the optical cables.
A: In general, there isn’t a need for a separate DAC while using an optical connection. Many sound bars, AV receivers, and certain speakers, for instance, have a built-in DAC that reads the data coming from the optical input. However, should you be connecting to a device that uses only analog signals or seeking to enhance the sound quality further, it may be prudent to use an external DAC that accepts an optical input.
A: Apart from the fact that the Chromecast audio used to have an optical output integrated to the 3.5mm jack, most audio output in streaming devices is today streamed through HDMI. However, if you need to connect a streaming device that doesn’t have an optical output to an audio system that only has optical input, You will be forced to connect it with an HDMI audio extractor or a similar devise that modifies the audio signal to optical connection.