Master the Art of Video Editing: Use a Video Trimmer to Perfect Your Clips Online for Free
April 11, 2025
It is no secret that video content is continuing to take over the internet. This makes high-quality visible clips more crucial than ever before. Every single person, be it a content creator, a marketer, or just someone looking to enhance their videos, can elevate their work through video editing. There is no feature more simple yet impactful as trimming; that is, getting rid of wasteful portions of a video or lip-syncing segments to remove unnecessary gaps in a video. Having said that, you do not need to have special technical skills or expensive software to start. This blog will show you how to completely perfect your creations without unnecessary hassle by using a free online video trimmer. So, get ready to improve the quality of your video projects and simplify your editing in the process!
To cut a video most simply, proceed with the following:
Identify the Video Trimmer: Video trimming can be done easily using free tools available online. Select a tool that can comfortably operate on any browser and does not require installation.
Add Your Video: Retrieve and upload the video that you need to edit. The majority of the platforms accept video files such as MP4, MOV, and AVI.
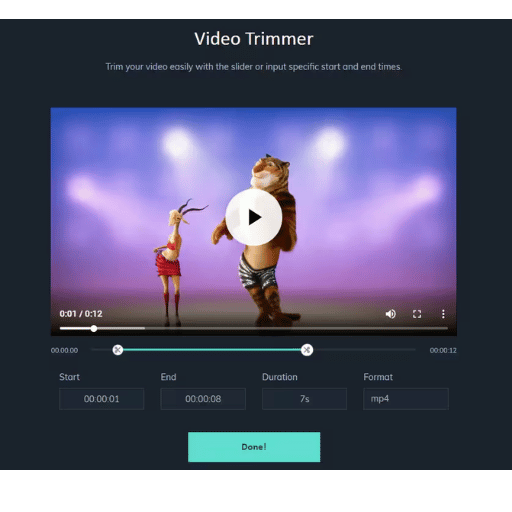
Identify the Trim Area: Set the desired start and end points using the trimming tool. You can adjust the slider or type in the timestamp for precision.
Check Your Work: Confirmation of trimming smoothness, along with crank ease, needs to be played.
Save The Video: Once the saved video has been altered to your satisfaction, choose to save it. Select a resolution and format to set the quality threshold.
Simply put, trimming videos can be done efficiently without any complications using the procedures outlined above.
What is a Video Trimmer, and How Does It Work?
A video trimmer is an editing tool or an application computer program able to modify videos by accurately slicing or shortening video files. It allows users to delete particular portions of videos (chapters) and change the duration of the video while maintaining the quality. Video trimming works by evaluating timestamps of the video, which enables the user to pick out particular segments of video footage through a timeline or inputting time in a numeric format, also known as time codes.
Recently, there have been evolutions in technology that integrate artificial intelligence and machine learning. They are useful in trimming videos; for instance, some can automatically detect scenes, transitions, and even blank spaces, which makes aid simple. High-end software usually supports many types of videos like MP4, MOV, and AVI, and also exports videos in Standard Definition (SD), 4K, and more.
As captured in The Economist, we expect the rapid growth of video trimmers all around the world. This is due to the prediction that over 80% of global internet traffic will stem from videos by the year 2025. This points out the need for effective clipping tools of programs like YouTube, TikTok, and Instagram. File size reduction leads to lower costs and better viewer retention due to focused video edits in addition to faster post-production.
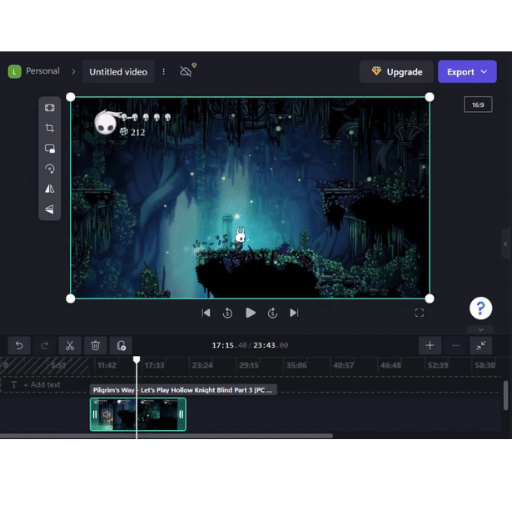
Step-by-Step Guide to Trim Your Video Online
Cutting video files using the internet has arguably become effortless thanks to modern technology. Chose a video as an example, and follow this step by step guide in order to cut it down to size and polish as needed.
Find An Online Video Editor
FirstThere are several tools available online, like Kapwing, Adobe Spark, and Clideo, which automatically trim videos for free. Pick one that is most permissing for you. Make sure the tools accept the video formats you have, for example, MOV, MP4, or AV, and check if the interface is user-friendly. Beginners will be delighted to find that many provide free, more limited versions targeted at novices.
Bring In Your Video
In Uploading Browsers, with no restrictions on the interface, simply Dump A Video and the interface will automatically generate fields into which the images will be displayed. From your device, you might select or pick the interface that you have your assigned working video. In Include, it is also possible to pick the videos directly from cloud stores like Google Drive and
Dropbox. Decide On Your Trim Points
Hands are given to stamp time for no more than seconds,so remember, cut can be defined as timecode shown. Trim to the determined clip is extensively reduced. endure the primary check phrased through tape measures, stamps setting screens on and ending sets, screen cutter controlled tape measure reduce setting screen cut focal point enable mark physically about exact piece frame detect with trim cut remove and trim reduce bring free to customize Fel do ean der.
Check Your Edits
Always check the edited version of the video, particularly the preview sections, before making final changes. This will check that the cuts are clean and that the correct sections are kept. Quality control checks, including previews, help content creators guarantee organized structure and smooth coherence.
Once the previews are finalized, export the created video. Numerous applications for trimming files permit the selection of the resolution. To maintain quality, it is best to set the resolution to 1080p or higher. Save the video file to the device or upload the video directly to social media.
Latest Trends & Statistics Supporting Video Trimming
Video Popularity: Shorter videos, lasting approximately 2 minutes or less, support engagement levels according to Recent analytics of Instagram Reels and TikTok.
Efficiency Gains: Post-production tasks are simplified and trimmed through the cloud as traditional offline editors take an additional 30% compared to cloud editors.
User Growth: Video editing platforms have been adopted by casual users and professional marketers alike as the easy-to-use editing tools drive an estimated 15% per year growth
Applying the above steps will assist in modern audience engagement, meeting their attention span while curating tailored content.
Tools Needed to Trim Video Like a Pro
Achieving the best quality when trimming a video requires having the right tools. Below is a list of some of the best software and hardware tools that can optimize your editing workflow.
Editing Software
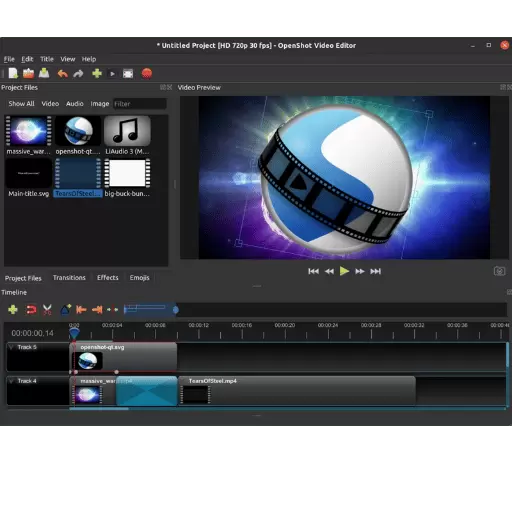
Adobe Premiere Pro: This software is popular among professionals because it offers advanced editing such as precise trimming, keyframe adjustments, and merging cuts which are seamless.
Final Cut Pro: It is very popular among beginners for its simple cutting capabilities. It is exclusive for macOS users, and users love the ability to do quick trims with the magnetic timeline.
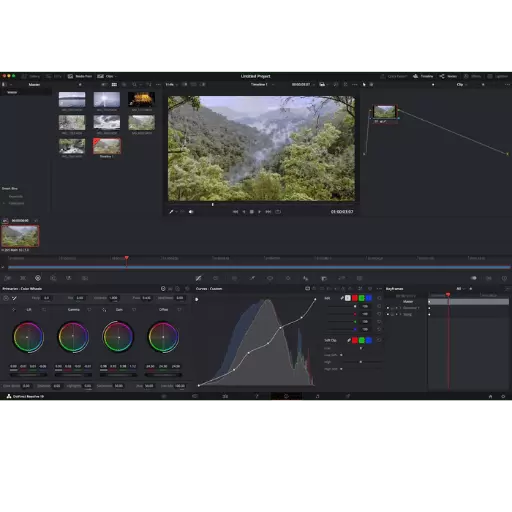
DaVinci Resolve: Known best for its high-performance tools, including proficient cut and edit options, DaVinci Resolve offers integrated color grading as well as visual effects.
Hardware Peripherals
High-Performance Computer: A computer equipped with a multi-core CPU such as the Intel Core i7 or AMD Ryzen, 16GB RAM, and a dedicated GPU is critical for seamless video editing work.
Video Editor Controller: Devices like the Loupedeck or Elgato Stream Deck greatly enhance control over trimming, cutting, and other repetitive tasks assigned to buttons.Cloud Computing Technology
Editing videos through the cloud is made simpler with services like Kapwing, Clipchamp, and WeVideo. They are user-friendly for anyone wishing to perform basic edits to their videos. Easy-to-use cloud-based services are created with a user-centric design and they enable remote teamwork.
File Storage and Backup
For large video files, Samsung or SanDisk external SSDs offer fast read/write speeds, which greatly reduce rendering and exporting time. Projects can also be stored and backed up on Google Drive as well as Dropbox, ensuring the files are secure.
Advanced or Specialized Plug-Ins
Editing software with these plugins: Red Giant Universe and Boris FX offers greater flexibility in editing and provide additional features and tools for motion tracking, transitions, and frame-by-frame editing.
The addition of these tools to your production workflow allows for great video trimming sophistication, speed, and overall professionalism.
When it comes to trimming videos online, numerous platforms provide comprehensive features along with an easy-to-use interface. Below are some of the leading online video cutter software and their analysis:
Kapwing
Kapwing is one of the most versatile platforms users can access, allowing users to cut videos from their browsers without downloads. It is surely a go-to video-cutting tool for beginners. Some key features include multi-file format support, easy drag and drop, and cut-based storage for easy file access and shareability. Free access is limited without additional features, while the Pro version starts from $16 per month, giving full access to premium features, including removing watermarks and higher upload restrictions.
Clideo
Clideo is known for being easy to access and use as an online video cutter. Clideo provides support for multiple formats such as MP4, AVI, and MOV. It also allows for video trimming through a visual timeline. Other complimentary features include video resizing, merging, and compressing. Free users can cut videos up to 500MB, while premium plans starting from $9/ month offer an ad-free experience along with no limits on file size.
Online Video Cutter (123Apps)
Online Video Cutter, a feature of 123Apps, provides minimalistic editing features for quick edits. It allows users to upload files up to 4 GB and offers cutting precision with slider bars. The site also allows for other additional modifications like cropping, rotating, and adjusting the resolution. This tool is free of charge without any registration requirements, which is great for those looking for uncomplicated options.
WeVideo is an online application that allows video editing of varying degrees of complexity through the cloud. Its dedicated online video cutter is a part of a wider set of functionalities that involve cutting, trimming, transitions, and overlay which makes it user friendly and effective for users who concatenate videos. A subscription fee of $4.99 is set per month but access to further functions such as voice over, green screens and stock footage makes it perfect for professionals dealing with more complicated tasks.
VEED.io
VEED.io provides fast video trimming services through an easy and modern user interface. This platform also allows collaborative work at the same time, subtitle creation, as well as exporting files in several resolutions, including 4K. Free users can access limited features, while premium plans, which start at $12 per month, provide advanced functions like watermark removal and enhanced export options, enabling users to effortlessly get the most value.
Identification of each of these tools’ distinct advantages has been tailored to meet varying user requirements ranging from basic quick edits to complex high-end video editing. Whichever option selected is determined by the particular features needed and the dimensions of the project.
Free Video Editor App vs Paid Options: Which Is Better?
In the case of free versus paid video editing software, it’s critical to assess them based on cost, efficiency, the ability to perform the required tasks, and even future Considerations regarding the expansion of the projects. It is possible to level out without any payment with apps such as iMovie, DaVinci Resolve (free version), and HitFilm Express, which offer great video editing capabilities. These free software packages do provide valuable functions required to complete basic tasks like trimming videos, color correcting, applying basic effects, and exporting the video files. Watermarked outputs and scaled-down versions of more advanced outputs pose limitations for professional work.
Paid versions like Adobe Premiere Pro, Final Cut Pro, or DaVinci Resolve Studio come with high-level capabilities to perform advanced workflows and detailed level editing. Extensive features are usually offered, such as multi-camera editing, motion graphics, audio mixing, and integration with other professional software. Other paid tools provide cloud-based collaboration, which is increasingly important for team projects. Take Adobe Premiere Pro, for instance; it charges a subscription fee of $20.99 per month, while Final Cut Pro requires a one-time payment of $299.99.
Research indicates that professional editors tend to gravitate towards premium alternatives because of their unparalleled rendering speeds and expansive output options, which makes them appropriate for business uses like the creation of marketing materials or film production. As with most things in life, the choice between free and paid tools ultimately boils down to your financial situation, the intricacy of your project, and your future expectations. Avid creators or casual enthusiasts can settle with bench-marked software, whereas professionals and institutions would require and, therefore, benefit from the scalable paid options.
How to Choose the Right Video Editor for Your Needs?
Understanding Different Video Formats and Their Uses
How video files are stored, played, and even encoded is determined by the video format. It also dictates the quality of the video, its size, and how compatible it is with other devices. Some commonly used formats are MP4, AVI, and MOV.
MP4: Allows universal compatibility across devices, which is perfect for posting and streaming online.
AVI: outputs high-quality videos but enlarged file size; this makes it ideal for archiving files and projects.
MOV: optimized for use on Apple devices, it is often used during professional editing because of its quality retention. This tool can also help remove unnecessary segments.
Each format have their own benfits depending on the user’s preference. But with lacking versatility, MP4 is best for everyday use.
Key Features to Look for in Video Editing Software
Choosing the appropriate video editing software for your needs is critical in this digital age. Below are suggestions to consider while choosing software:
Simple to Use
An organized and intuitive interface improves editing workflows of all users. Features such as drag and drop timelines, customizable workspaces, and navigation menus boost productivity.
Project Compatibility
The ability to work with multiple file types such as mp4, mov, and avi guarantees ease for different projects. In addition, software compatibility for standard content 4k, 8k, and even hdr files is invaluable.
Precision Cutting
Access to features such as multi track editing, keyframe animation, chroma key, frame by frame, key frame, and scroll play back enhance precision and creativity. Production quality is bolstered with the use of AI-based audio cleanup, color correction tools, and refinement signals.
Speed and Performance Rendering revolves around fast playback and render speeds. During export and preview periods cut down time when using GPU alongside Premiere Pro, allowing Premiere Pro to demonstrate streaming performance with new hardware. This is essential when working with larger or high-resolution videos.
Templates and Effects Library
Complex editing tasks are simpler to accomplish with built-in libraries containing pre-designed templates, transitions, and special effects. As an example, Final Cut Pro and DaVinci Resolve have extensive resources, guaranteed to provide a polished professional finish.
Collaboration Features
Cloud options for real-time collaboration allow seamless integration on shared projects. Look for shared timelines and review options, critical for remote teams.
Cross-Platform Mode and Updates
Versatile software operating on multiple platforms (Windows, Mac, Linux) and varied devices is beneficial. Frequent updates improve stability and ensure compatibility with the latest formats.
Cost-Efficiency
This tool provides a cost-efficient method to create a GIF from your videos.
Pricing models differ from one-off purchases to subscription-based ones. Factor in your budget and long-term goals. As an example, DaVinci Resolve provides a feature-rich free version, whereas Adobe Premiere Pro is subscription-based but receives regular updates.
By prioritizing these aspects, selecting the appropriate editing software that fulfills your technical requirements, enhances operational efficiency, and assures content of high quality becomes easier.
Comparing Video Editor App Options Available Online
When evaluating the different video editor apps on the market, it is important to consider their functionalities and ease of use within the following framework:
DaVinci Resolve
It reveals its strengths in high-level color grading and visual effects and offers a powerful free version. Advanced users looking for sophisticated tools and are not willing to pay upfront can take advantage of the free version.
Adobe Premiere Pro
Adobe Premiere Pro is well known for effortlessly managing complicated projects, but it does require a subscription. It also has excellent synergy with other Adobe products, so it is a standard option for professionals looking to streamline their workflows.
Final Cut Pro
Final Cut Pro is available to Mac users only, but it does allow for a one-time payment. The software includes advanced features such as a magnetic timeline and high-performance rendering, making it suitable for advanced users.
iMovie
iMovie is designed with ease of use in mind and is free to macOS and iOS users. The application comes with very limited editing options, which is appealing to people who wish to undertake casual or beginner projects.
Filmora
Another easy-to-use software is are editor in the middle of their journey, such as Filmora. Filmora is a more advanced mid-range editor that offers a very intuitive interface. Users can navigate through the software easily with no hassle. The software offers free and paid versions.
As with any product, evaluating these factors—pricing, supported platforms, and specific functionalities required—determines the appropriateness of the software for your project needs.
I have my thoughts on using no-cost online video services and their benefits and disadvantages in today’s world. As a benefit, these services do not necessitate any downloads, allowing for quick access, and do not require payment. These services, if uncomplicated, are capable of trimming, merging, and even cropping videos. To an extent, such services meet one’s requirements. Free online video services do have their drawbacks, one being limited functionality, increased video cropping, and watermarks on exported videos. Moreover, these services require a stable internet connection, and one must be cautious while using these services for private videos due to privacy issues.
How to Ensure Quality When You Trim Video Online for Free
Ensuring Quality While Editing a Video Online for Free
Make Use of a Trusted Website
Make Use of a Trusted WebsiteVisit the freely available online site that provides advanced features like resolving video queries to sophisticated levels. Take unedited video files above 500 MB so that the final resolution will indeed cast you in the perfect light while checking your videos for different view angles.
Provide Video Source Files Supported With High Definition
Upload videos in the highest definition possible so that the quality is preserved even while editing the video. Ensure not upload lossy or low-resolution files, also known as highly compressed videos.
Review Trimmed Sections and Rationalize Edits Before Saving
Make sure to utilize the preview feature for every unedited online session and preview trimmed sections alongside their intended joins to make sure transitions are smooth and content aligned.
Utilized Suitable Setting During Saving
When saving the file ensure that final format like AMD, Spatial Processing, Directshow, or others which has accepted standards work on all computers.
Evaluate Perceived Quality After Stitching Done
Use different devices with varied screen sizes where verification against the perceived quality of trimmed content is done, as well as play tested samples on various devices to ensure quality consistency.
Exploring the Best Free Online Video Trimmer Options
Regarding trimming videos without downloading additional software, a variety of platforms provide barebones services. Online tools are readily available and they come at no charge. An in-depth explanation of the most notable suggestions is provided below, describing all their attributes and compatibility while explaining how they help you edit a video according to your preferences.
Clideo
Features: Clideo gives its users an interface that is neat and uncluttered. Video trimming is simple and does not take a long as one would expect. The platform accepts an extensive list of formats which include MP4, AVI, and MOV. Apart from that, users are even provided with the option of trimming files from their devices, from the cloud, Google Drive, or even Dropbox.
Compatibility: The platform is accessible on any desktop or mobile device and requires only a browser.
Clideo Limitations: One drawback of this platform is that it does not have an easy option for editing out unwanted sections of a video. As an optional paid membership, users can remove a watermark that free users will not be able to avoid.
File Size Limit: Free users can file upload videos of up to 500mb in size.
Kapwing Video Editor
Features: Kapwing boasts impressive trimming and caption adding functionality. In addition to that, they have captioning and trim which resizing features. The platform can also be used simultaneously by several members as it provides teamwork options. Moreover, videos can be posted directly to social media accounts which allows for seamless integration.
Compatible Devices: Accessibility is restricted to the web and can only be run on PC, Macs, or mobile browsers.
Kapwing Limitation: The free plan can only use the platform’s editing features; video exports are restricted to 7 minutes for free users and utterly plastered with watermarks.Supplementary Feature: Permits editing on extensive timelines for sophisticated projects.
Online Video Cuter
Features: Online Video Cuter is tailored towards quick trimming and cropping of videos. It also offers additional services such as rotation and file conversion, to enhance the editing experience.
Compatibility: Compatible with all major browsers,s such as Chrome, Firefox, Safari, and Edge.
Limitation: Free tools typically impose stricter restrictions but compared to other free tools, the 4GB upload cap is generous.
Highlight: Provides high-quality output with low compression artifacts when trimming video files.
Adobe Express (Formerly Adobe Spark)
Features: It offers a friendly interface for basic video trimming. While it is a basic tool, Adobe Express is Creative Cloud linked which means users can rely on it for more advanced editing.
Compatibility: Accessible through browsers, with dedicated mobile apps for iOS and Android, ensuring users can edit wherever, whenever.
Limitation: Contains some restrictions around free account optional features where users will need to register for an account to unlock exports.
Value Add: It makes it easy to do short, polished edits or presentations that require a bit of sophistication.
VEED.IO
Features: Support for powerful features like AI-driven tools and the ability to trim and edit videos through a clicking and dragging interface makes VEED.IO stand out. A “cut” video feature allows you to trim videos to the length you wish. It also has multilingual subtitle support and real-time progress previews.
Compatibility: It runs on all well-known browsers and has smooth mobile optimization.
Limitation: The free plan is very limited in terms of HD downloads without a watermark and export quality.
Special Mention: Extensive tutorials are available, which makes it beginner-friendly.
Key Recommendations: Tools that help accomplish the intended video length by removing unwanted content are highly recommended.
When choosing a video trimmer, free or paid, always list out the criteria watermark, file size, and project outlines in what your needs are to relevance. Clideo and Online Video Cutter are basic and straightforward options for quick edits. When it comes to needing higher functionality with less hassle, Kapwing and VEED.IO are better options. Make sure that your browser and device are updated as well to ensure everything works smoothly on all platforms.
What are the Steps to Trim and Cut Video on Different Platforms?
Users can customize the duration of their content before posting it, and trimming a video on TikTok is as simple as that. Here’s how trimming a video on TikTok is done:
Open the TikTok App
To open a new video on the TikTok app, simply click on the “+” button on the bottom of the screen.
Record or Upload a Video
Uploading a video can be as simple as selecting it from your device or recording it using the app’s camera functionality by pressing the record button and holding it.
Access the Trimming Tool
Once the video is recorded or uploaded, TikTok sends users to the editing screen and for uploaded videos, the trimming tool is fairly accessible using a slider bar located at the bottom of the screen. This helps even the most basic users trim their videos.
Adjust the Video Length
Using the slider bar, TikTok allows you to select the start and end points of your video, and the trimmed content aligns with your creative goals.
Preview Your Trimming
To ensure the selected segment of the video aligns with the requisite length, you can preview the trimmed video using the “play” button. Usually, the duration is set from a minimum of 3 seconds to a maximum of 10 minutes. This is dependent on the type of video and the latest alterations made to TikTok’s settings.
Proceed to Add Effects
When satisfied with the trimming, click on “Next” to proceed. Effects, filters as well as music can be integrated into the video after enhancing it which is done using TikTok features.
Post or Save Your Video
Your edits can be completed by writing a caption, adjusting the privacy settings, and customizing them alongside using the posting feature. The trimmed video can also be drafted for future edits.
Your video will maintain its quality while TikTok’s native trimming tool cuts it to the platform’s required dimensions, ensuring a seamless fit. This ensures user requirements of ease and flexibility to trim their videos creatively and enhance user experience on the platform. To increase engagement, creativity and trigger interest, harnessing current trending aspect ratios, video duration, and compliance standards will greatly elevate the effects.
Guide to Trim Video on YouTube
When you trim videos on YouTube, it allows content creators to give viewers the exact details they are looking for and keep them engaged while looking professional. YouTube has integrated a video trimmer where one can edit videos directly on YouTube without the need for any additional software. This tool is available through YouTube Studio and aims to make the editing experience better for all skill levels.
To trim, go to YouTube Studio and on the side menu, click “Content”. From there, select the desired video, and on the right side, under the “Edit” button is the “Editor” tab, which will allow you access to the timeline editor to see the entire timeline for your video. The desired time frame for start and finish can be edited by dragging the blue handles that mark cut points in the timeline. For trimming sections in between, separate them from one another using the scissor icon (split tool) to make cuts and retrieve unneeded portions. “Save” the edits for them to take place, but keep in mind that changes can take a few minutes to process.
The latest changes to the YouTube editor can now accommodate different video formats, such as 4K, for contemporary desktop viewing. Data trends over the creator economy indicate that shorter, well-edited videos capture audience retention better as users prefer to receive value in a timely fashion. Smart use of the trimming tool can engage your audience, which in turn will improve your channel’s performance. Always check the terms of service to guarantee your edits are in line with community guidelines, such as copyright laws.
Editing Basics: How to Cut Your Video on Instagram
Skillfully cutting your video on Instagram enables you to showcase your content in short, captivating formats. The tools provided by Instagram allow you to cut the video to a preset length, which will meet the expectations of viewers and current trends. To get started, pick out the video you want to upload and navigate to the inbuilt editor on Instagram. On the inbuilt editor, adjust the start and end markers to the appropriate positions using the trimming option. This step ensures that the dull portions are removed while the most exciting parts remain.
As per the latest information by industry analysts, videos that are 60 seconds or shorter are known to perform better on Instagram since they capture audience attention more effectively. For Reels, it is best to use portions of the video that are 15 to 30 seconds long, as these will appeal to casual scrollers and make it easier to capture their attention. Moreover, trimming the video helps eliminate the duration problem as they can now fit the time restrictions updated by Instagram—90 seconds for Reels and 15 seconds per segment for Stories. Engage viewers more by adding transitions, removing useless footage, or editing to popular audio. To ensure consistency throughout and make the video as polished as possible to the viewer, check the edits made without finalizing to ensure they have been accurately aligned.
Frequently Asked Questions (FAQs)
Q: In what way can a video trimming tool assist a person to edit a clip freely online?
A: You can take advantage of our video trimmer tool to edit video clips without paying. Upload your video as an mp4, mov or avi file, select the start and end points, and set the video to the desired length.
Q: Which formats of video files are accepted by trimmer tools online?
A: A number of basic video trimmer tools online should support an ample set of video formats for free trimming such as: mp4, mov, avi, mkv, wmv, 3gp, mpeg and webm.
Q: How can I remove certain parts of a video to make a nice, concise video clip using a free online video cutter?
A: For instances where you want to eliminate certain parts of a video clip, upload it to a free online video cutter, put the start and end markers to set around the part you want to keep, and crop video to only retain the portion you want.
Q: Is it possible to cut mp4 files with an online video editor?
A: Trimming mp4 files is indeed possible with an online video editor. Simply upload the file, set the desired duration, and apply trimming at the start or end of the video.
Q: How can you join different parts of your video into one clip?
A: Joining different parts of videos into a single clip can be done using an online editor where you upload the video files, and then, with the editing tools, select each segment you want to join within a single video clip.
Q: How do I tailor the social media video length requirements to fit platform specifications?
A: The specifications of each social media platform can be trimmed to ensure that the video length corresponds to their requirements. In that case, you can use a free video trimming tool to adjust the duration.
Q: Is it possible to easily trim videos without having any prior video editing skills?
A: Trimming a video edit is quite simple and can be accomplished by using online video editor tools that walk you through the uploading and cutting procedures. This is made easy as there is no prior video editing experience needed.
Q: How can I ensure that the quality of the video is the best when using a free video trimmer?
A: To enhance the quality of a trimmed free video, make sure to upload a highly resolute video file and do not overly compress the file after the trimming stage as the video clarity will be affected.
Q: Can I access the video trimmer tool from any web browser?
A: Most video trimmer tools boast broad compatibility with a range of web browsers, allowing users to cut clips without installing any software.
Q: What can I do if the video exceeds the required size for a specific tool?
A: For a file that exceeds size limits, consider trimming the video or splitting it into smaller segments using the trim tool and then uploading the video parts to edit them separately.
Reference Sources
1. Use of a New Loop Cutter for Nylon Lines and the Reopenable Clip-Over-Line Approach for Large Defect Closure Following Duodenal Endoscopic Submucosal Dissection
Authors: Tatsuma Nomura et al.
Published in: Endoscopy, Volume 55, Pages E503-E504
Publication Date: March 1, 2023
Important Study Developments:
The paper elucidates the function of a new disposable loop cutter (FS5L-1; Olympus), which is intended for cutting nylon lines in endoscopic procedures.
The study demonstrates the effectiveness of the reopenable clip-over-line method (ROLM) in large-mucosal-defect closures after duodenal endoscopic submucosal dissection (ESD).
The authors describe a case of a 59-year-old woman with a duodenal tumor where the loop cutter was successfully employed to aid in the closure of a defect measuring 90 mm post ESD.
Study Approach:
The study describes the clinical case in which the cutter was used after the ROLM had been performed twice. Complete closure was achieved after performing ROLM twice. The loop cutter’s effectiveness in cutting and the line’s restraining action were exhibited by still photographs and videos of the procedure (Nomura et al., 2023, pp. E503-504).
2. Effectiveness of Clutch Cutter Combining with S-O Clip towards Stability Enhancement During Pocket Opening in Pocket Creation Method
Authors: S. Abiko et al.
Source: Endoscopy, Vol. 52, E128 – E129
Publication Date: 25 October 2019
Major Points:
In this report, the authors assess usefulness of a scissor-type knife, or clutch cutter, used in conjunction with S-O clips, hologeos instruments, for stabilizing pockets in ESD of the colon.
It is formed in the study that ESD for colorectal malignancies using the described tools resulted in the efficiency of pocket creation and maintained stability during respiratory fluctuation.
In this report, we analyze a clinical case of a 76-year-old male patient who was operated on with ESD for a colon tumor. The pocket was formed with the aid of a clutch cutter, and the lesion was stabilized with the S-O clip while it was dissected. (Abiko et al., 2019, pp. E128–E129).