Maximizing productivity and the above processes depend on how efficiently the server rack is managed. In the large toolbox of accessories, the 1U brush panel is perhaps best described as practical since it makes cable management and airflow enhancement easier. Both of these functions contribute significantly to server rack maintenance. In this article, we will delve deeper into how effective rack organization is achieved with the help of a 1U brush panel. We will dissect how the design benefits and practicality of this addition can improve the infrastructure’s efficiency and durability. Executives managing data centers will appreciate the panel’s professional touch, as will hobbyists configuring home labs. This article will provide insights directly applicable to optimizing server racks.
What is a Brush Panel, and How Does It Work?
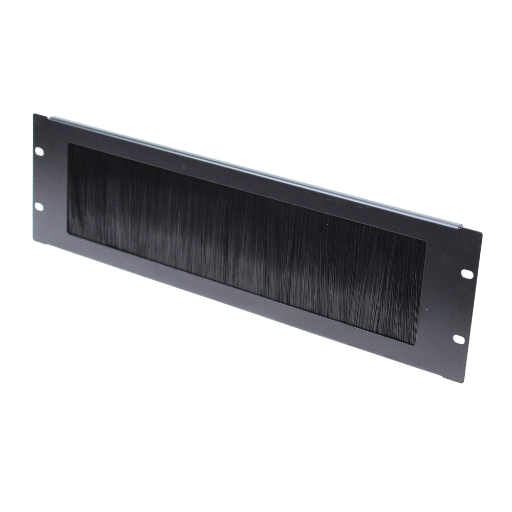
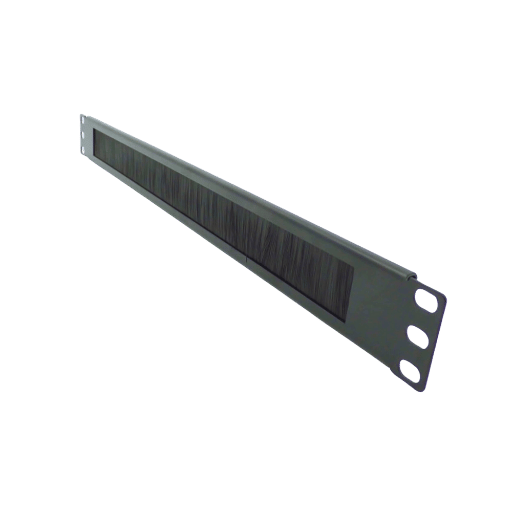
A brush panel is a type of cable management accessory frequently used for server racks and cabinets. It is also referred to as a brush strip panel. It serves two primary functions:
- Cable organization: The panel enables cables to travel throughout the panel while remaining orderly which is beneficial in maintaining a professional image in server environments.
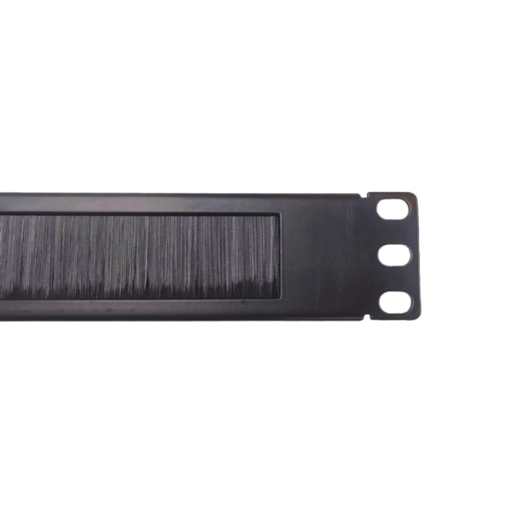
- Dust and airflow management: The dense bristles of the panel assists in dust retention by preventing it from entering the cabinet, as well as allowing airflow through it. Proper airflow is very important in cooling and prevention of equipment overheating.
Server racks usually have installed Brush Panels in various sizes, such as 1U, for differing configurations.
Understanding the Brush Panel Concept
Brush Panel is found in graphic design and digital art software like Adobe Photoshop and Illustrator, and it enables users to customize and manage different brush settings. Aspert, the software has the option to adjust brush size, shape, hardness, opacity, flow, and other dynamics such as scattering, texture, and dual brush effects. This panel assists in creating specific and custom brush strokes, which helps in attaining the correct artistic effects or styles that the artist is trying to achieve. It is usually found on the menu or the toolbar and is extremely beneficial when dealing with digital painting, design, or retouching work.
The Role of a Brush Panel in Cable Management
By offering an organized method to route cables through server racks and enclosures, brush panels are integral to cable management. They fulfill the need for a cable pathway which does not permit excessive dust, debris, or airflow obstruction. With a brush panel, I can keep my professional setup clean and ensure that cables look neat and are secured properly.
The advantages of brush panels are not all cosmetic. Strain on the cables is alleviated, cables become less tangled, and they are easier to access for maintenance or upgrades. Moreover, brush panels improve cooling efficiency, which enhances airflow control in data centers or network environments. This helps to increase equipment reliability and performance.
The brush panel is an indispensable aspect for any high tech workplace as it addresses the need for effective organization and order conducive to creating descriptive and intricate setups.
Benefits of Using a Brush Panel in a Server Rack
Cable Organization
- Brush panels simplify managing cables by enabling through-pass connections, eliminating redundant loops and enhancing access to plug peripherals.
Controlling Airflow
- They prevent gaps in the rack, and thus additional recirculation of warm air, or overheating while providing protection for air intake, optimally directing fresh air currents.
Minimizing Dust
- Covering the opening of the cables with brushes reduces the rate of dust entering the rack which protects delicate devices.
Ease of Accessibility
- They make it easy to add or remove cables from the rack without displacing other components, making routine cleaning, maintenance, and installation faster and hassle-free.
Enhanced Appearance
- Professionals where order is paramount will appreciate that brush panels provide a server rack that is organized and enable smooth professionalism with sophisticated cleanliness.
Brush panels serve a server environment with practicality by being simple tools to provide defined efficiency, security, neatness, and order.
How to Install a 1U Brush Panel?
Step-by-Step Installation Guide
The following procedures will assist you in properly installing a 1U brush panel:
Gather the Needed Tools and Equipment
- Make sure to acquire the 1U touch panel alongside the accompanying screws, which are typically provided. Additionally, you will require a standard Phillips head screwdriver for installation.
Prepare the Rack
- Locate the 1U slot on your server rack that you would like to use. Ensure this area is clear and accessible for unobstructed installation.
Align the Brush Panel
- Mount the drill template on the 1U listed touch panel, making sure that the mounting holes are properly positioned at the threaded holes of the rack.
Secure the Panel
- Begin by placing the screws in the mounting holes. Using the screwdriver, fasten the screws and check that the panel is sufficiently tight. Be careful not to overtighten because this could damage the panel.
Check the Installation
- Ensure that the brush panel is firmly fixed and the bristles on the brush panel are at an even height so they can organize the cables efficiently. The panel should capture adequately the cables for organized management.
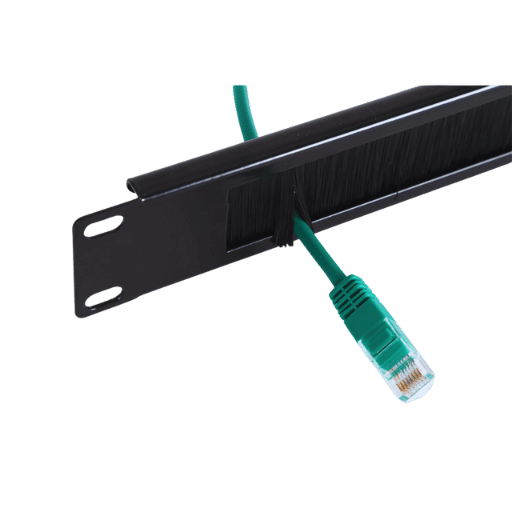
Route Cables Through the Panel
- Very carefully, lead the cables through the aperture of the brush. The bristles will assist in the concealment of the cables while also retaining order.
Congratulations, these procedures have enabled you to install the panel successfully, your server rack will now be organized.
Tools Required for Brush Panel Setup
To install a brush panel (or brush wall plate), you will need these tools and materials:
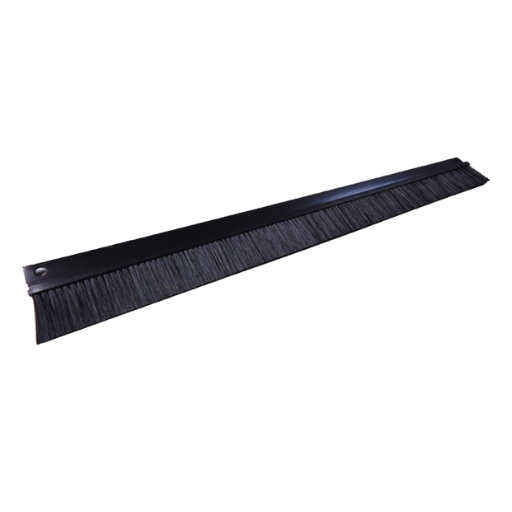
- Brush Wall Plate – This is the primary component of cable management.
- Mounting Bracket − Used to hold the wall plate firmly.
- Electric Drill or Screwdriver – Helps in driving screws into place.
- Jab Saw or Drywall Saw – This is used to make a rectangular cut onto the wall.
- Ruler and Pencil – Essential for defining where and what sizes need to be drawn.
Having these outlined will help you achieve a proper installation.
Common Installation Mistakes to Avoid
Below are some of the mistakes you should try to avoid during installation:
- Not following procedure: skipping any reading of instructions provided by the manufacturer is a sure way to perform a wrong installation without guidance.
- Using the Wrong Tools: Wrong tools can greatly deface a material or lead to an inappropriate fitting.
- Neglecting the area for installation: Cleaning and leveling the area that is intended for installation is important in order for one to create a reliable barrier which is critical to the success of the installation.
- Measurement Deviations: Anything that pertains to fitting parts to align as required needs to be ensured that the measurements given are correct otherwise the outcome will not be as required.
- Overtightening or Undertightening: Parts in an assembly can be damaged in the case where either too much, or too little force is applied.
- Ignoring set safety guidelines: When basic safety measures are not considered, then there is as much risk of sustaining unnecessary and serious injuries
- Not having timeline guidelines: Aggressively hurrying encourages errors to be made and parts or steps to be skipped.
- Not testing the final product: In the absence of testing a product in order to ensure that it functions appropriately.
Although these errors are simple, basic noticing and avoiding them helps greatly in the ease of the installation process.
Exploring the Specifications of a Brush Panel
Key Specifications to Consider
Brush panels come with some specified particulars worth taking into consideration, which are as follows:
- Surface Material: The most durable stainless steel, aluminum, and quality plastic offers the required texture.
- Brush Density: Better dust handling and superior cable management are ensured using higher-density bristles.
- Panel Size: In addition to accommodating the prescribed cable volume, check that the panel fits your rack or enclosure.
- Panel Cable Volume: Verify that the panel can hold the number and size of cables you want to manage.
- Rack Integration: Check that the panel will work with your type of rack, such as a 19-inch standard rack.
- Panel Fixing Simplicity: Look out for panels with quick mounting mechanisms first.
- Panel Texturing: Observe that the panel has an uncluttered, polished finish to ensure the desired appearance.
Keeping in mind these details would enhance effective cable protection and management for your case scenario.
Compatibility with 19-Inch Racks
Racks sized 19 inches are standard for equipment set up in sectors such as IT, telecommunications, and audio-visual systems. Equipment designed for 19 inch racks usually has a width of 19 inches ( 482.6 mm ) and their height is measured in units commonly termed as rack units (U) where 1U=1.75 inches ( 44.45 mm ).
Equipment measurements relevant to a 19-inch rack include;
- Width: The equipment to mount must be 19 inches wide to fit into the mounting rails of the rack.
- Mounting: The device must come with rack-mount brackets so that it can be attached firmly.
- Height: Check that the equipment’s height is given in rack units (U) and does not exceed the space in the rack allocated for it.
Specifications of the product always confirm these compatibilities.
Understanding Cable Management Features
Safety, functionality, and aesthetics are improved with cable management features that organize, secure, and conceal cables. Features marked with a check include:
- Cable Trays and Channels: These prevent cables from tangling by neatly holding them in place.
- Cable Sleeves: These protectively hold multiple cables under one covering.
- Grommets and Pass-Throughs: These grommets enable neater passthrough of cables through surfaces like desks.
- Velcro Straps: Enables adjustable and reusable cable bundling.
- Under Desk Mounts: Hides cables from floor sight, ensuring a clutter-free appearance.
These features enhance an individual’s workspace organization while also reducing the chances of tripping while simplifying maintenance within a worksite.
What Do Customer Reviews Say About Brush Panels?
Common Praises and Criticisms
Praises:
- Cable Management – Brush panels are well-known for neatly organizing cables, which enhances the appearance of the server racks.
- Dust and Airflow Control – The panels effectively prevent dust from entering and reduce cold air leakage in data centers which improves cooling efficiency.
- Ease of Installation: They are often praised for their straightforward installation.
- Cost-Effectiveness – A lot of brush panels are inexpensive and of good quality.
- Durability: The materials, including steel frames and bristles, are often cited for their durability.
Criticisms:
- Brush Realignment – Relaying the brushes after passing the cables through can be tedious, and misplaced bristles are frequently a problem.
- Limited Strength – There is not enough strain relief for some heavier cables for certain models.
- Bristle Quality: In some instances, bristles may bend too easily or become misaligned, decreasing their effectiveness.
Overall, these panels are considered good for their intended function and price but, depending on the specific application, may have some minor shortcomings.
Real-World Customer Reviews Insights
Here is an analysis of actual customer feedback for Brush Panels:
RIVECO 1U Brush Panels:
- Pros: Clients commend the robust construction and the simple installation process. The panels provide proper cable management for the server racks, resulting in a neat and tidy appearance. Further, they help maintain airflow and prevent dust accumulation.
- Cons: Some users stated the brush material could be reinforced with heavier weight for increased capacity to accommodate bigger cables.
Tecmojo 1U Brush Panel:
- Pros: Rated exceptionally high for durability and functionality. Clients commended the compact brush strips for proper cable management. Therefore, installation was easy due to the hardware provided. It was noted as a great solution for professionally appearing and orderly server racks.
- Cons: Some users noted they had some difficulty threading thick cables through the brushes.
Both products provide effective cable management while enhancing the visual appeal of server racks and received feedback pertaining to brush density and the handling of cables.
Additional Information on Brush Panel Accessories
Choosing the Right Accessory for Your Needs
To select the most appropriate brush panel accessory, consider these factors below:
- Purpose: Identify if the accessory will be used for enhancing beauty, dust preventing, or cable managing. An example would be brush strips which help organize cables while preventing dust entry.
- Compatibility: Confirm whether the accessory is appropriate for the panel size and type. Always check the dimensions of the mounting for acceptance to avoid mismatches.
- Material: In cases of heavy-duty industrial and vehicular traffic environments, consider high-performance durable materials such as nylon or polypropylene for added durability.
- Ease of Installation: Save time and effort with accessories that feature easy installation, such as snap-in or screw-mount.
Considering all the factors above, you can select the brush panel accessory that fits your exact specifications.
How a Brush Panel Prevents Cold Air Loss
A brush panel helps to seal the cold air leakage by enclosing the openings of data centers or server racks where cables come in and out. The dense bristles of the panel act as a blockade preventing the escape of cold air while forcing it to the cooling required components like servers, routers and switches. This maximizes cooling airflow, curtails energy expenditure, and keeps the systems within ideal operating temperature range.
Combining Patch Panels and Brush Panels for Optimal Efficiency
Organization and effectiveness are essential components of structured cabling systems. One way to increase cable management is combining brace panels and brush panels that function synergistically to keep the system running seamlessly. Through this combination there is less clutter, better airflow, and protection of your equipment, whether it is short term or long term.
Advantages of The Combination of Patch Panels and Brush Panels:
1. Improved Order of Cables
Cables in a server or a network rack can be really disorganized and chaotic over time. Utilizing patch panels for connectivity and brush panels fpr cable pass through keeps cables in order even in highly populated places. Such level of technological order allows easier upkeep of the system and resolving of common issues.
2. Better Airflow
Air circulation is vital in averting the overheating of network cabinets or any other enclosures. Brush panels contribute to clean and effective cable setup, minimizing things that can impede or limit airflow. Along with patch panels, they form part of a well ventilated system and sustain the longevity of the equipment.
3. Seamless Upkeep
It is easy to access the cables and maintain them when they are all arranged in an orderly manner. During the expansion or repair of your network, it is not hard to identify the connections. The patch panels centralize all connections, reducing the time taking for one to understand where to fix them, and the dust exclusion that brush panels provide makes upkeep easy.
4. Prevention of Cable Wear and Tear
Cables that are poorly de-skilled and over-populated get damaged easily. The use of patch panels and brush panels in combination minimizes cable wear by reducing strain on individual cables. In addition to reducing the wear and tear on cables, it also maintains the integrity of all connections.
Frequently Asked Questions (FAQs)
Q: What is a 1U brush panel, and how does it optimize a server rack?
A: As a brush grommet style 1RU brush panel, 1U brush panels also serve as rack mount accessories used for cable management and promoting airflow in equipment racks or cabinets. A 1U brush panel enables a cable to be fed through a grommet while preventing counterflow discharge air from escaping which enhances cooling efficiency in your server rack.
Q: What are the specs of a typical 1U brush panel?
A: For example, a typical 1U brush panel is intended for mounting to equipment racks or cabinets. It is spaced to fit 19 Inch racks and it occupies 1U vertical space (1.75 inches). Moreover, it is usually black powder painted. The brush grommet is made of nylon bristles so that a grommet through which cables are passed is neat and orderly.
Q: What is the difference between a 1U brush panel, a blanking panel, and a filler panel?
A: As compared to blanking panels and filler panels which simply cover voids in a rack, a 1U brush panel has more than one function. It not only blocks off empty space in a rack, but also manages cords and cables. Because of its design, the grommet with brushes enables passage of cords and cables, making it suitable for organizing EtherNet, Cat6, or other cords in your server or network equipment configuration.
Q: Is it true that a 1U brush panel can accept multiple different types of cables?
A: A 1U brush panel is indeed more versatile having the capacity to accept multiple cables including but not limited to Ethernet, UTP, fiber optic and power cables. It can also accommodate coaxial, audio, and C14 power cables. Grommets are made with the capability to withstand a range of the diameter of cables while keeping them air tight so that no airflow is able to escape.
Q: In what ways does a 1U brush panel assist with cable management in a data center?
A: With regards to cabling, data centers have a clean appearance and order due to a 1U brush panel that aids in routing cables through the brush grommet. This organizes, simplifies, and improves the tracking of wiring and cables. It also ensures that appropriate airflow is maintained and that cables do not obstruct the ventilation openings in the rack or cabinet.
Q: Do third-party brush panels fit 1U brush panels?
A: Most 1U brush panels have been manufactured to be compatible with standard 19-inch equipment racks; thus, they can be used alongside rack accessories such as those made by other manufacturers. They integrate easily with various solutions, such as vertical or horizontal cable planners.
Q: What steps do I need to follow to install a 1U brush panel in my server rack?
A: Installing a 1U brush panel is quite simple. First of all, select an appropriate place on your rack. After that, attach the panel to the mounting holes using the provided rack screws. Ensure that the panel is level and seated properly. Then, organize your cables in a manner that does not restrict airflow and pass them through the brush grommet on the panel.
Q: Where can I purchase a 1U brush panel, and what are the packaging options?
A: You can find 1U brush panels at different online stores, direct IT dealers, and manufacturers. Larger deployments can be purchased in bulk or repacked. While adding them to the cart, ensure to check the packaging options since some suppliers sell in bulk at discounted prices. Custom quantities or specifications can also be requested through a formal quote.
Reference Sources
19-inch rack
Category 6 cable
Cable management
Post Views: 357