In contemporary data centers, the rack mount systems serve as the backbone of the enterprise IT infrastructure. These uniform structures serve the purpose of accommodating server units, auxiliary storage units, and even network apparatus, whereby making sure proper order, access, and cooling are achieved. This blog will discuss the fundamental architecture, primary attributes, and useful applications of rack mount systems. By examining their structure and practical use, we hope to elucidate how such systems optimize IT operations, increase expandability, and facilitate multi-faceted, high-performance workflows across different sectors.
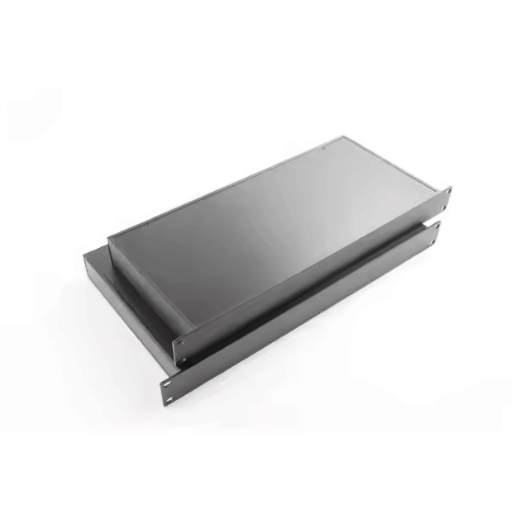
A rack mount system is one of the standard defined outlines used for the housing and arrangement of equipment in IT and Networking. They are usually 19 inches wide, as these systems offer an expandable and space saving method for mounting crucial hardware components such as servers, switches and routers. Because of the standardized design, integration of equipment improves alongside ventilation and cable management. These systems are crucial in data centers and other technical facilities.
Rack mount systems have been standardized to make sure there is a wide range of configurations and hardware compatible with it. Here are some of the key specifications and descriptions:
Rack Units (U): The height of the equipment which is to be arranged with the help of a rack mount is commonly termed in rack units (U), where 1U equals 1.75 inches. A 1U, 2U and 4U are commonplace but greater equipment may go across other units due to the intricacy of the hardware.
Width Standardization: Most rack mounts have 19 inches width as their industry standard which enables the interoperability of components manufactured by different vendors within the same rack system.
Depth Variability: While the width is uniform, rack depth can be tailored to different server and hardware designs, ranging anywhere from 24 inches to well over 36 inches.
Weight Capacity: Depending on the model of the rack, the weight capabilities can vary anywhere between 200 lbs. to over 3,000 lbs. This is contingent upon proper construction, reinforcement, and anchoring.
Cooling and Ventilation: Open frame racks, as well as those with perforated doors, achieve effective cooling. These open-vented designs are very important for airflow which is required for the stability of a system and overheating prevention.
Cable Management: The integrated features of cable trays, hooks, and buckle systems not only allow for efficient storage of network and power cables, but they also aid the maintenance of the workplace together with improved aesthetics.
Power Distribution Units (PDUs): To ensure seamless power distribution to the devices mounted on a rack, many of them come with PDUs to provide a stable and constant flow of power.
Rack mount systems are specifically designed to meet the needs of contemporary IT infrastructure, focusing on organization, flexibility, and efficiency. Their compliance with technical requirements makes them ever so useful in areas where versatility and dependability are essential.
Rack mount systems integrate a multitude of elements aimed at increasing the productivity and functionality of server racks and data centers. The functionalities of mount systems include the following.
Serves constitute the primary equipment kept in racks as they perform basic operations like processing, data managing, and data storage for the information systems.
PDUs control and power units balance and divide the power and electricity between the systems to make sure effective energy management.
Cooling infrastructure like rack fan and liquid cooling systems are important to achieving a safe temperature operating environment while reducing the risk of hardware failures.
These systems relieve the cabinet from organized wires by putting them in designated places which reduces working space and enhances movement within the working area.
Operated in racks as a socket for devices in order to offer inter-connection for interaction and data exchange within the blocks.
Centralized and scaleable storage’s are best supplied by mounted storing devices, which includes network attached storage (NAS) and storage area network (SAN).
Mount systems give support to apparatuses therefore makes working and using, installing, and configuring easy since the various sizes can easily be arranged.
KVM switches help the administrator in multiple server operations thus making the management of server effortless and smooth.
The functionality and integration of modern server racks and data centers are enhanced by each component performing their described actions. These components collaborating ensure the smooth execution of diverse IT systems.
19-inch rack mount and 1U rack mount have a difference in their physical dimensions and purposes as their primary difference. 19-inch rack is the standard width given to the entire rack system as it accommodates devices of various dimensions as well as ensures compatibility across devices. Per contra, 1U defines a single rack unit in height measuring 1.75 inches, which specifies the vertical space an equipment occupies in the rack. Both standards ensure effective organization, scalability, and space optimization within the data centers.
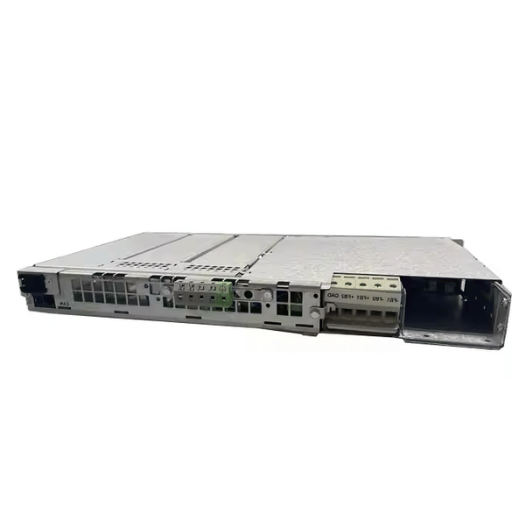
While selecting the appropriate rack mount power system, remember to analyze the operational and future growth requirements of your data center. Start by defining the total power ceiling that needs to be supported including the current equipment and future growth space. Review power distribution options like single-phase or three-phase systems based on the type and quantity of devices you intend to support. Furthermore, determine the efficiency rating of the power system, making certain that it is aligned with your facility’s cooling systems, optimizing energy use. Operational reliability can also be improved with remote management features, redundancy, and enhanced surge protection. These criteria should be paired with the organization’s technical requirements and estimated growth to make the correct choice of shelf power system to balance performance and resilience.
For effective operational safety and structural integrity, understanding the weight capacity and correct mounting hardware for rack mount systems is crucial. Key details include:
Weight Capacity:
Estimated ranges for typical racks: 500 lbs. to 1,200 lbs.
Heavy-duty racks can support up to 3,000 lbs depending on the manufacturer and model.
Fixed rails – Gives solid and secure mounting with no movement. Best for static setups.
Sliding rails – Allow better access to components for further maintenance or upgrades.
Screw Types:
Standard screws (M6, M5 or #12-24 depending on rack specification).
Several options for faster assembly without tools are offered.
Cage Nuts:
Suitable for racks with square mounting holes. Also allows more freedom with part placement.
Grounding Kits:
Provides safe electrical grounding for the equipment, ensuring safety and compliance with legal regulations.
All these specs will tailor the system in a optimized safety manner for proper integration within rack systems. Make sure to always contact manufacturer documentation for exact weight and hardware limits dealing with safety standards.
Integration of Power Distribution Units (PDUs) with cable management units must be done properly so its operational, organizes workflow and cuts down downtime. Below are highlighted considerations.
PDUs have a set input voltage between 120-240V AC, depending on the connections used. Some high capacity data centers may use 3-phase PDUs to split the load.
Amperage Capacity: The load requirements dictate the amperage capacity of most PDUs which is rated at either 10A, 15A, or 20A. For 4kW power draw racks for instance, it is common to connect them to a 20A, 208V PDU.
Outlet Types: Mixed C13 and C19 outlets are standard with PDUs and NEMA 5-15R outlets. It is imperative that the outlet types corresponds with the power connectors of the devices to be installed.
Monitoring Capabilities: Advanced form of PDUs comes with real-time energy monitoring while providing metrics such as voltage, current, and energy consumption with a web server or a centralized software.
Vertical Cable Managers: These are for installation at the server rack’s vertical edges, they control up to 200 cables per channel to prevent overcrowding.
Horizontal Cable Managers: With equipment arranged above and below them, these systems will serve to arrange the patch cables in an ordered manner, and are designed with D-rings or brush strips.
Cable Bend Radius Compliance: Adhering to set minimum bend radius requirements such as 5 times the diameter of a Cable (Cat6) for proper drag line mitigates potential signal degradation or microfractures.
Material Specifications:
Plastic organizes the cables along the wall with ease. This optimizes cost and weight.
Steel alternatives offer more durability to the installation as well as better grounding for high power applications.
Keeping comprehensive documentation for the power and cable layouts is just as useful for troubleshooting as it is for future scaling. Creating a labeling system for every cable and connection helps simplify identification while also minimizing errors during maintenance activities.
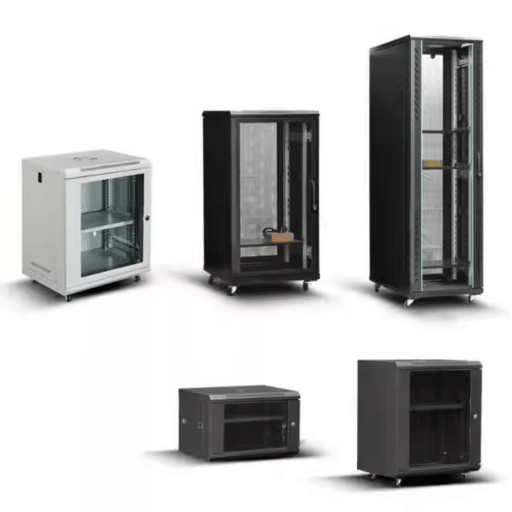
Your hardware choice plays a critical role in ensuring that your rack mount system is both stable and secure. Given this, we have listed some of the most essential items for the installation.
Material: Steel or stainless steel that has been plated with zinc to prevent rust.
Sizes: Most common sizes are M5, M6, and 10-32 based on the rack.
Function: Cage nuts are used in providing threaded pockets to screws and are placed in square mounting holes on racks.
Type: Screws are either pan-head, flat-head, Phillips or Torx.
Sizes: To correspond with the size of the cage nuts (M5, M6, 10-32).
Features: An additional benefit of screws is that many have washers which are designed to prevent damage to equipment while distributing pressure as they tighten.
Flat Washers: Prevent the screw from digging into the rack or equipment.
Lock Washers: Hold the screw fast against vibrations that may occur over a given timeframe.
Material: Rugged steel to prevent bending or premature deformation under excessive loads.
Use Cases: Stabilizes equipment during installation for heavy equipment.
Clip Types: Velcro straps, ties that can be reused, or adjustable metallic clamps.
Purpose: Prevents snagging and helps to prevent stress on mute ports.
Production Drawings: Contain instructions on how to manufacture wire guides as well as special brackets used for fastening power units to racks alongside screws.
Retention Clip: Serves the purpose of securing the power cable to the outlet device.
Appropriate selection of hardware at every step of the process, permits you to attain an elegant and fully operational professional rack mounted system.
Essential Equipment: A screwdriver, leveling, and other manufacturer tools must be on hand.
Inspect that all parts have been accounted for; verify warehouse receipt against PDUs; digital cable organizers verification of rack rails.
Rack Parameters:
Vertical Measurement (U size): Vertical space is indicated in U’s, racks are preserved in 42U, 24U, etc. For each specification check what equipment is placed in.
Weight Rating: Obtain the maximum load bearing weight for each rack, an example rating would be 1,000 lbs static capacity.
Locate the installation peripherals inside the rectangle of the housing tracks. Employ the screws or brackets provided within the documents for placement.
Adhere to suggested load centering alignment provided by the manufacturer.
Givens: Specific Metric: The rails are to support equipment with measurement ranging from 24”-30” in depth.
Establish a stable center of gravity by placing heavier components first, such as servers placed at the bottom.
Use adjustable screws or mounting brackets to secure the units. Make sure all units are flush with the rails to avoid creating stress points.
Organizing the cables without airflow obstruction zones, bind them with Velcro straps or plastic cable clips into organized bundles.
Recommended bend radius for the cable: a minimum of 1.5 inches to avoid damaging the sheath.
Avoid electromagnetic interference (EMI) by routing power and data cables separately.
Confirm stability and secure mounts by lightly pulling installed equipment to check for movement.
When powering on the devices, ensure all connected systems work seamlessly.
Conduct airflow checks and monitor ventilation within the rack.
Following these step-by-step instructions ensures the rack is installed with professional level requirements relative to functionality, safety, and efficiency.
Proper ventilation and airflow optimization within the rack requires monitoring the following key data points:
Operating devices should maintain an ambient temperature range of 64°F to 80°F (18°C to 27) for optimal performance.
Use temperature sensors in the upper, middle, and lower sections of the rack to measure variations.
Confirm that all equipment utilizes a front-to-back airflow pattern for optimal cooling efficiency.
Check that intake vents are facing the cold aisle and exhaust vents face the hot aisle.
Allocate 1U to 2U of blanking panels to voided rack slots to stop hot air from recirculating within the enclosure.
Ensure that cooling systems deliver the requisite airflow, in Cubic Feet per Minute (CFM), for the installed components.
Perform regular operational checks on the fans and cooling units.
Maintain positive air pressure inside the data center to avoid drawing external contaminants inside.
Monitor and control positive or neutral air pressure with pressure detectors as necessary.
Organize cables to maintain order and prevent airflow hindrances.
Utilize zip ties and cable arms to optimize the arrangement of cables.
Concerning these specific parameters allows the rack environments to sustain effective thermal control and lessen potential overheating and system failure incidents.
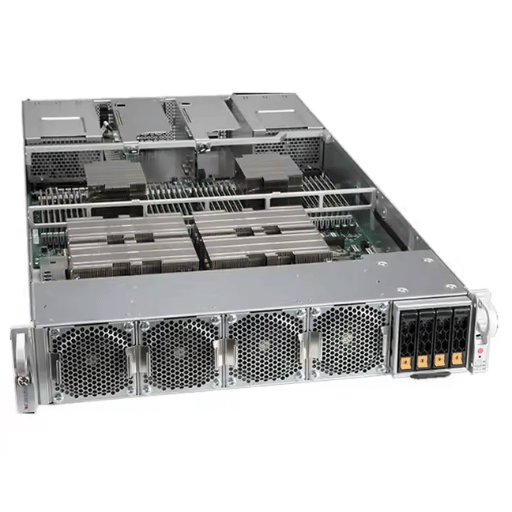
Like any rackmount system, these have also been designed with the optimal cooling configuration in mind. Cooling is critical to the operation in high-density environments, and proper airflow management can save data centers up to 20% of energy consumption according to research. Perforated front and rear door panels, adjustable fan arrangements, and even blanking panels geometrical features all serve the purpose of enhanced airflow in a given environment. As an example, one study determined that utilizing blanking panels to prevent recirculation improves thermal performance by higher than 10 degrees F on average.
Furthermore ASHRAE (American Society of Heating, Refrigerating, and Air Conditioning Engineers) establishes server room temperatures to be 64.4°F and 80.6°F. Efficient rackmount cooling set ups will ensure that these standards are met enhancing system reliability, and extending component lifespan.
Sustaining openings airflow directional patterns enhances cooling effectiveness even further Utilizing hot aisle-cold aisle configurations with consistent airflow patterns can improve cooling effectiveness reducing hotspots by over 30%. Combining to metered pressure differentials, controlled by adjustable fan speeds, alongside variable workflows ensures that airflow is proportionally responsive to the real-time operational demand, serving the purpose without excess energy expenditure.
Designing for Accessibility and Modular Configuration Flexibility increases operational efficiency. Systems integrated with modular components increase efficiency as they can be customized on different operational levels without impacting other modules, thus allowing maintenance to be conducted in a more effective manner. Moreover, clearly defined cable access routes coupled with component servicing performed with no tools enhances the serviced parts accessibility which greatly reduces complex interfacing servicing time.
The approach taken towards securing and organizing network equipment must be well founded to achieve the set objectives. Cabling systems have been defined to enhance order by eliminating tangles and cluttering. As noted in a report by the Data Center Infrastructure Standards Group in 2022, structured cabling reduces the related downtimes due to troubleshooting by as much as 30 percent.
From a security perspective, locked rack enclosures, along with controlled access gates, are vital for safeguarding sensitive equipment. Studies show the use of biometric authentication or RFID-enabled access control systems decreases unauthorized entry attempts by up to 85 percent. Additionally, maintaining spatial separation between power and data cables reduces electromagnetic interference (EMI), which can corrupt data or degrade signals, facilitating predictable and secure performance across the network. Meticulous labeling of cables and ports enhances administrative control while aiding accessibility during maintenance activities.
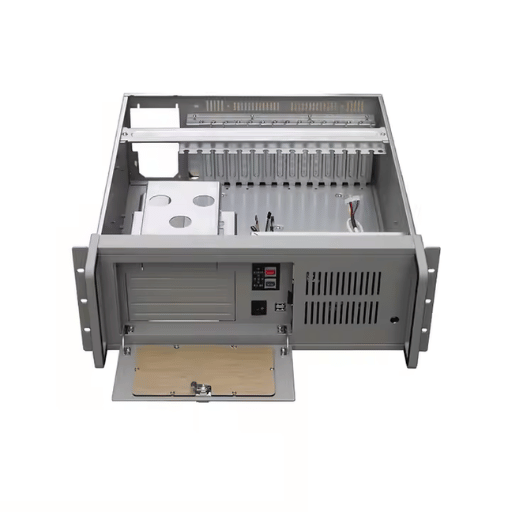
A: Configurations with rack mounts serve the purpose of storing and orderly arranging various types of electronic equipment, including but not limited to servers, networked devices, and other hardware that is rack mount compatible. Such configurations also offer an orderly and organized environment for the equipment that optimizes spatial efficiency, improves cooling, and simplifies management and maintenance operations.
A: In this case, the size of a rack mount configuration is characterized by the number of units (U) it is able to contain. For example, a 12u rack can hold equipement totalig 12 units in height. As amount of equipment is the determining factor, one should think about present requirements and realistic future increases. In the case for a 600mm depth, height and depth, make sure that all devices would be able to fit into the configuration.
A: A wall mount configuration is intended to be attached to a wall, designed for smaller installations or areas with limited floor space. In contrast, a floor-standing rack mount such as a 15u or 19-inch rack is placed on the floor where it is easier to support larger and heavier equipment. The decision depends largely on space allocation and equipment weight.
A: Yes, patch panels are typically installed in patch rack configurations to maintain orderly network cabling. Patch panels are designed to fit readily into a patch rack using standard mounting brackets and are accessible from the front for maintenance or updates.
A: A 4 post rack offers better strength and support than a 2 post rack. There are four mounting points which allows better rack stability on heavier items like servers and rackmount computers while allowing better weight distribution. Also, a 4 post rack usually has the option of installing side panels which adds to the security and cooling capabilities of the rack.
A: Keeping adequate airflow in the racks is essential for proper cooling. Open-frame designs as well as fan and ventilation system installations could solve this problem. Equipment should be positioned to permit unobstructed air circulation from the front to the back. Obstructions along the airflow pathways should also be removed. Airflow blocking PDUs must also be avoided.
A: A rack mount kit consists of all the necessary hardware and brackets for proper equipment mounting within a rack enclosure. If you do not have rack-mountable equipment, then you would require a kit to facilitate proper installation. Kits ensure devices like desktops or appliances are safely stored in the racks.
A: Use removable side and front panels to allow easy access to equipment for maintenance or upgrades. Improved access can also be made by the use of sliding or extending rails and 1U shelves with more reachable placement of the rack’s rear devices.
A: Planning the power supply for a rack mounted configuration requires you to think about the overall power utilization of all components and make certain that the unit’s PDUs are within the tolerable limits. Also, redundancy needs to be considered, incorporating at the very least, dual PDUs or uninterruptible power supplies (UPS).
A: Tripp Lite has products that focus on proactive and reactive solutions to equipment and room power in rack mounts PDUs, UPS units and rack mounts. In the context of the rack mount setup, the purpose of Tripp Lite is to guarantee the equipment within the rack receives uninterrupted, dependable power and protection from spikes and surges.
1. A Novel Design of Rack Mount Server Thermal Simulator: Design, Assembly, and Experimental Verification
2. Characteristics of Unsteady Flow Field and Flow-Induced Noise for an Axial Cooling Fan Used in a Rack Mount Server Computer
3. Improving Cooling Efficiency of Servers by Replacing Smaller Chassis Enclosed Fans with Larger Rack-Mount Fans